How to create a subpage in WordPress

Creating a subpage in WordPress is a straightforward process. Here’s a step-by-step guide:
Step 1:Log in to your WordPress Dashboard:-
Go to your WordPress website and log in with your administrator credentials
Step 2: Navigate to the Pages Section:-
In the WordPress Dashboard, find the “Pages” section in the left-hand menu. Hover over it, and you’ll see options like All Pages, Add New, Categories.

Step 3: Create a New Page:-
Click on “Add New” to create a new page. This will open the page editor.

Step 4: Enter Page Title and Content:-
Give your subpage a title in the “Enter title here” field. Enter your page content in the main editor area. This content might include text, images, videos, or any other elements you want on your subpage.
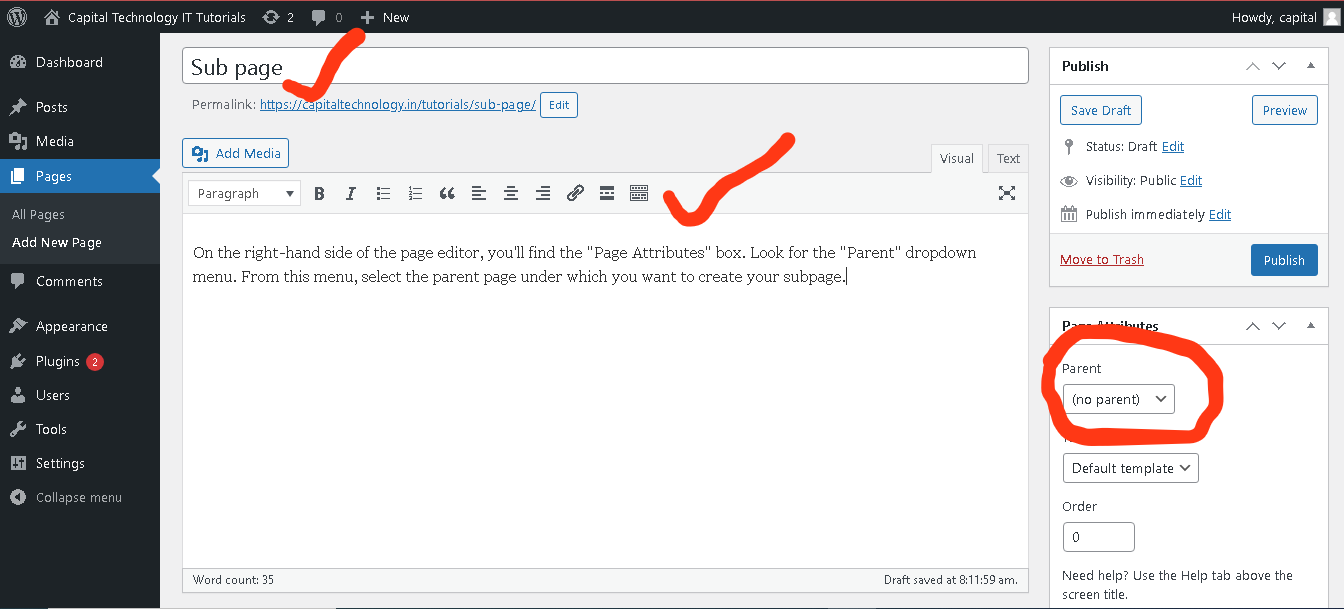
Step 5: Set Parent Page:-
On the right-hand side of the page editor, you’ll find the Page Attributes box. Look for the Parent dropdown menu. From this menu, select the parent page under which you want to create your subpage
Step 6: Publish Your Subpage:-
Once you’ve added your content and selected the parent page, click the “Publish” button to make your subpage live on your website.

Step 7: View Your Subpage:-
Visit your website and navigate to the parent page you selected. You should see your newly created subpage listed under the parent page.
