Add Post list in WordPress

1. Login to WordPress Dashboard
- Go to your WordPress site and log in.

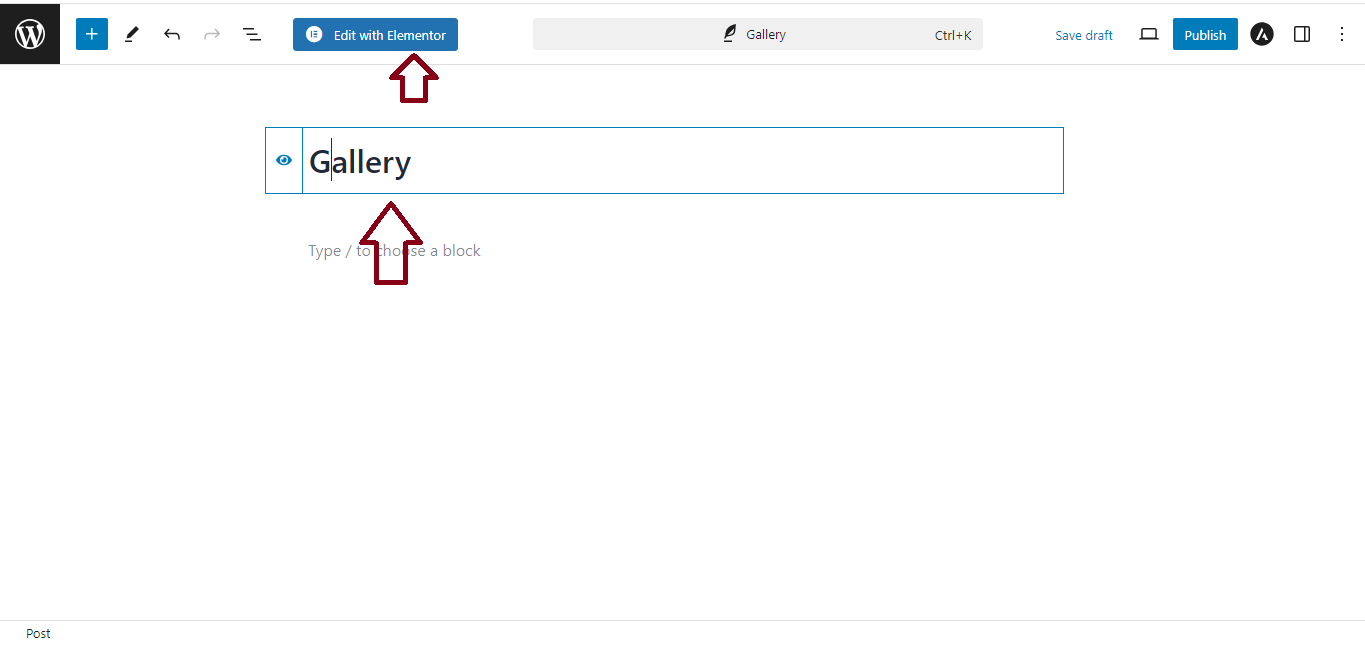
2. Create or Edit a Page
- Go to Pages > Add New (or edit an existing page).
- Click Edit with Elementor to open the Elementor editor.
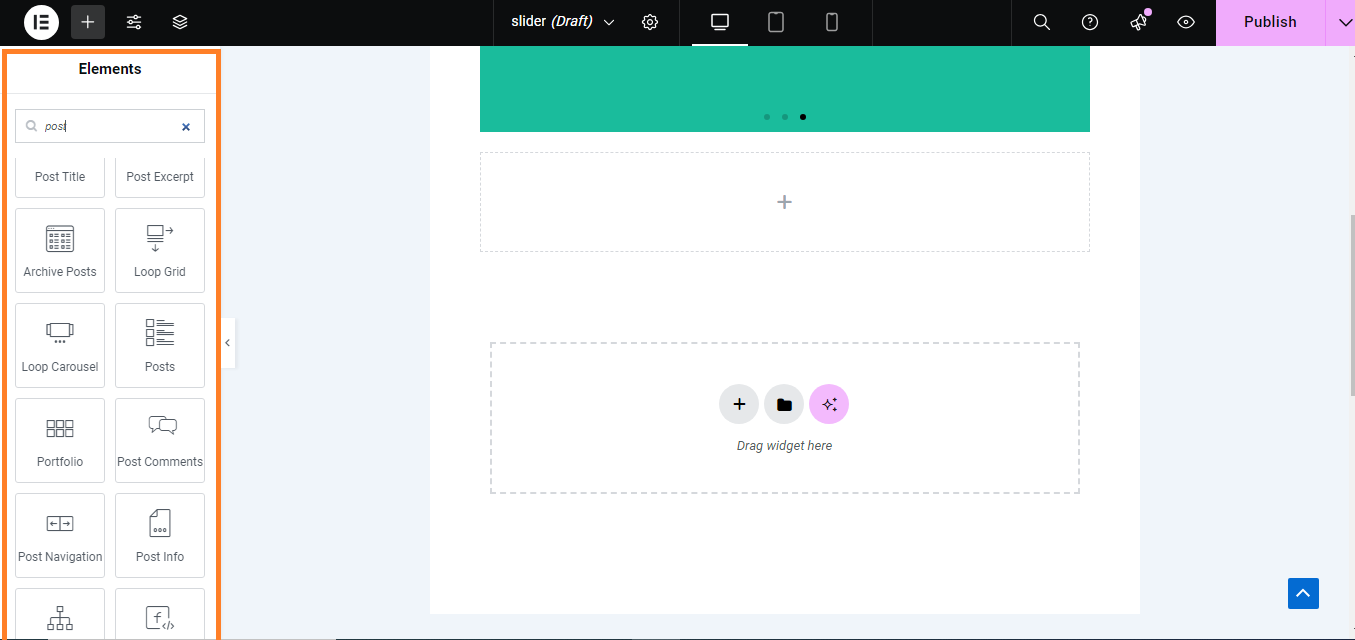
3. Use the Posts Widget
- In the Elementor editor, search for the “Posts” widget.
- Drag and drop the Posts widget onto your page where you want the post list to appear.
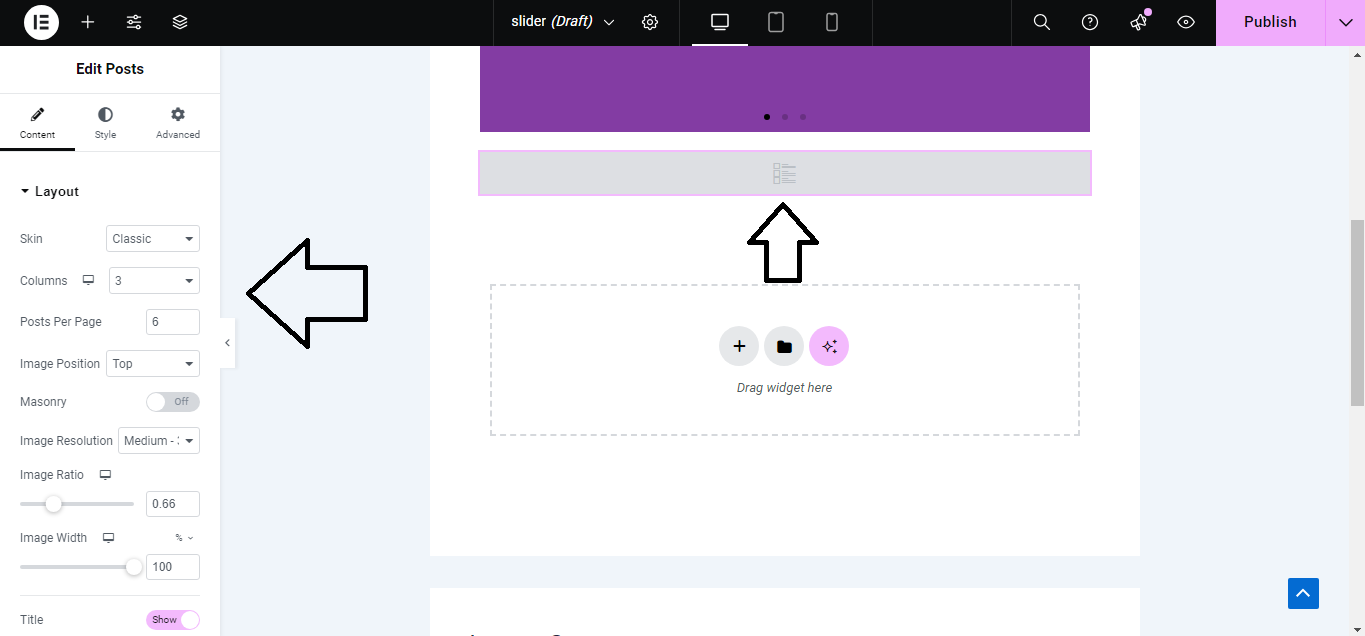
4. Configure the Posts Settings
- In the Content tab of the Posts widget:
- Layout: Choose how you want to display the posts (e.g., grid, classic, or cards).
- Post Count: Set how many posts to display.
- Offset: Specify if you want to skip a certain number of posts.
- Post Type: Select the type of posts to display (e.g., posts, pages, custom post types).
5. Set Query Options (Optional)
- Under the Query section, you can:
- Filter posts by categories or tags.
- Sort the posts by date, title, or other criteria.

6. Customize Post Content
- Still in the Content tab, you can customize:
- Post Info: Toggle to show or hide post info (like date, author, categories).
- Excerpt: Enable or disable the post excerpt.
- Read More: Customize the text for the “Read More” button.

7. Style the Post List
- Go to the Style tab to customize:
- Posts: Adjust the spacing, borders, and background for each post.
- Post Title: Customize typography, color, and spacing.
- Post Excerpt: Style the excerpt text as needed.
- Button Style: Change the style of the “Read More” button.

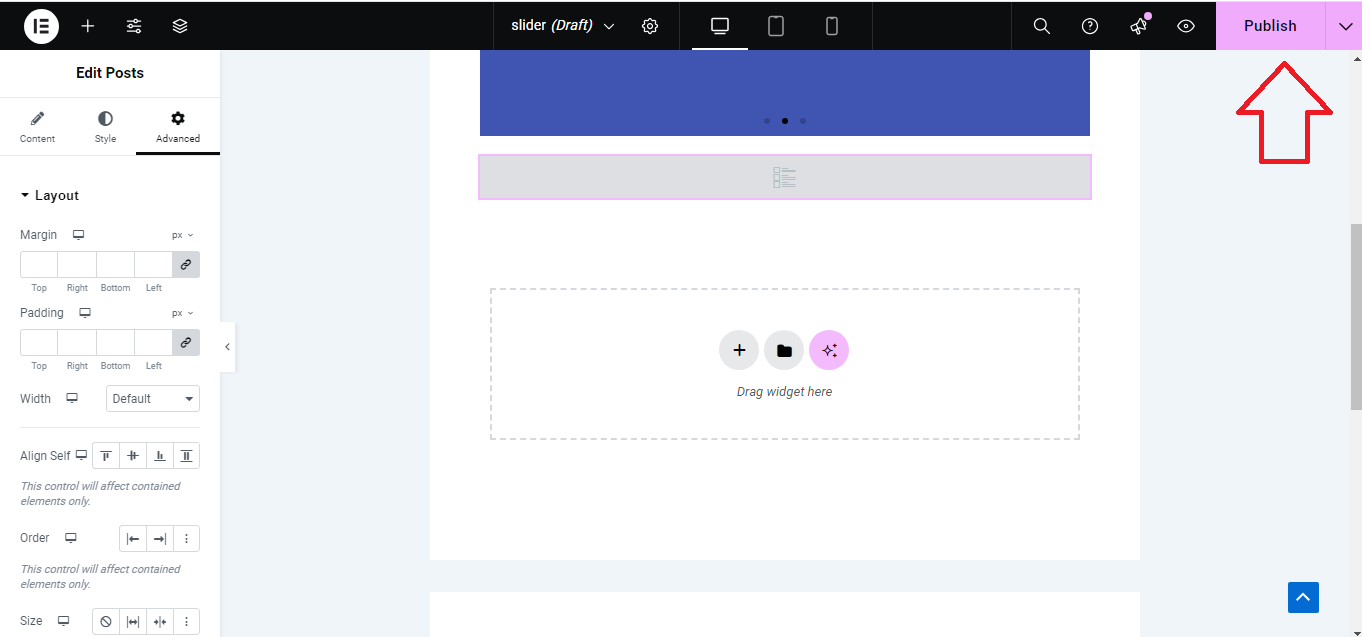
8. Advanced Settings (Optional)
- Click on the Advanced tab to set margins, padding, motion effects, and other advanced settings.

9. Preview and Publish
- Click the Preview button to see how your post list looks.
- If everything is satisfactory, click Publish to make your changes live.
Your Post List is now ready and displayed on your WordPress site using Elementor Pro!


