Add Image Gallery in WordPress (FooGallery Image Gallery Plugin)

Here are the easy steps to add an image gallery in WordPress using the FooGallery Image Gallery Plugin:
Step 1: Install the FooGallery Plugin
- Log in to your WordPress admin dashboard.

- Navigate to
Plugins>Add New.
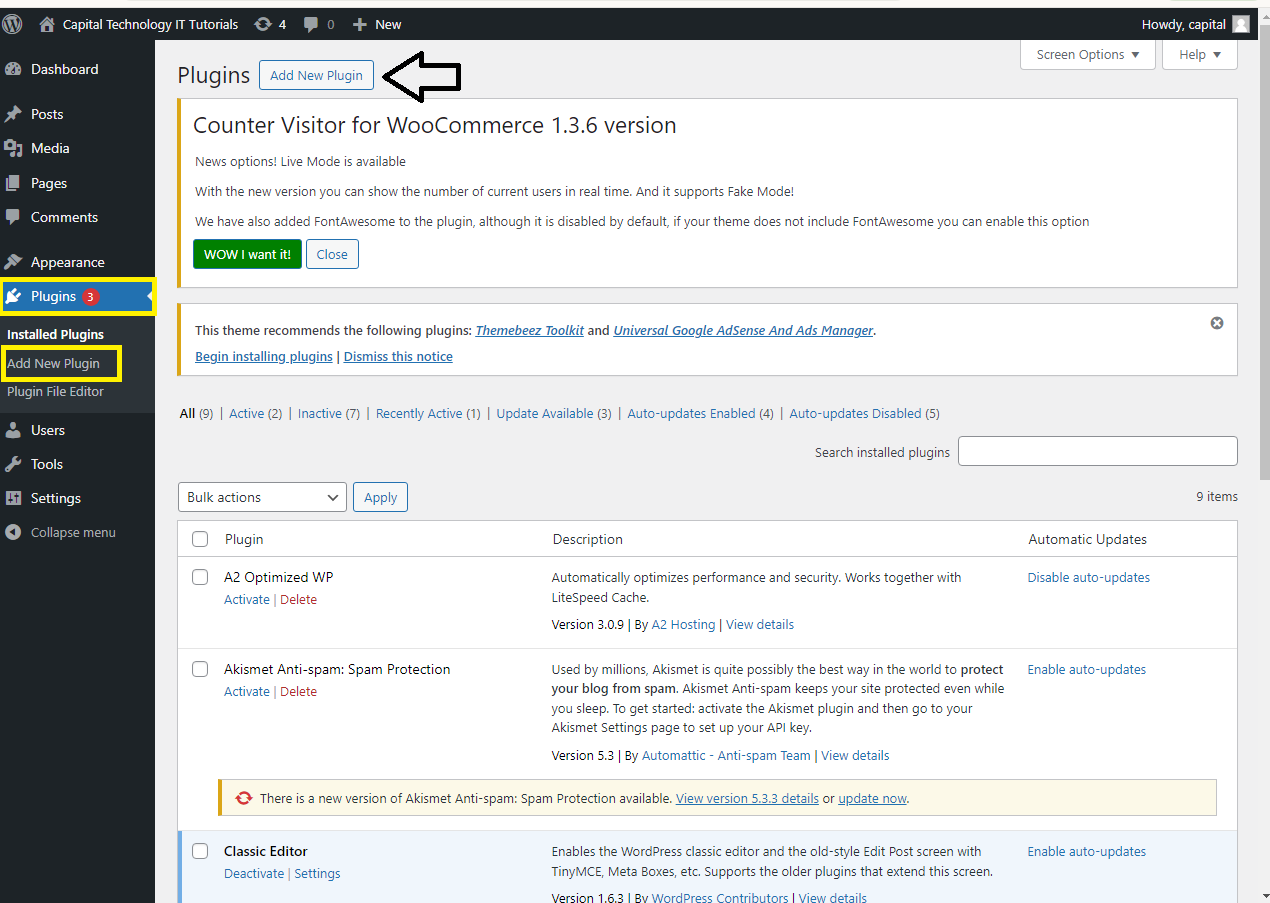
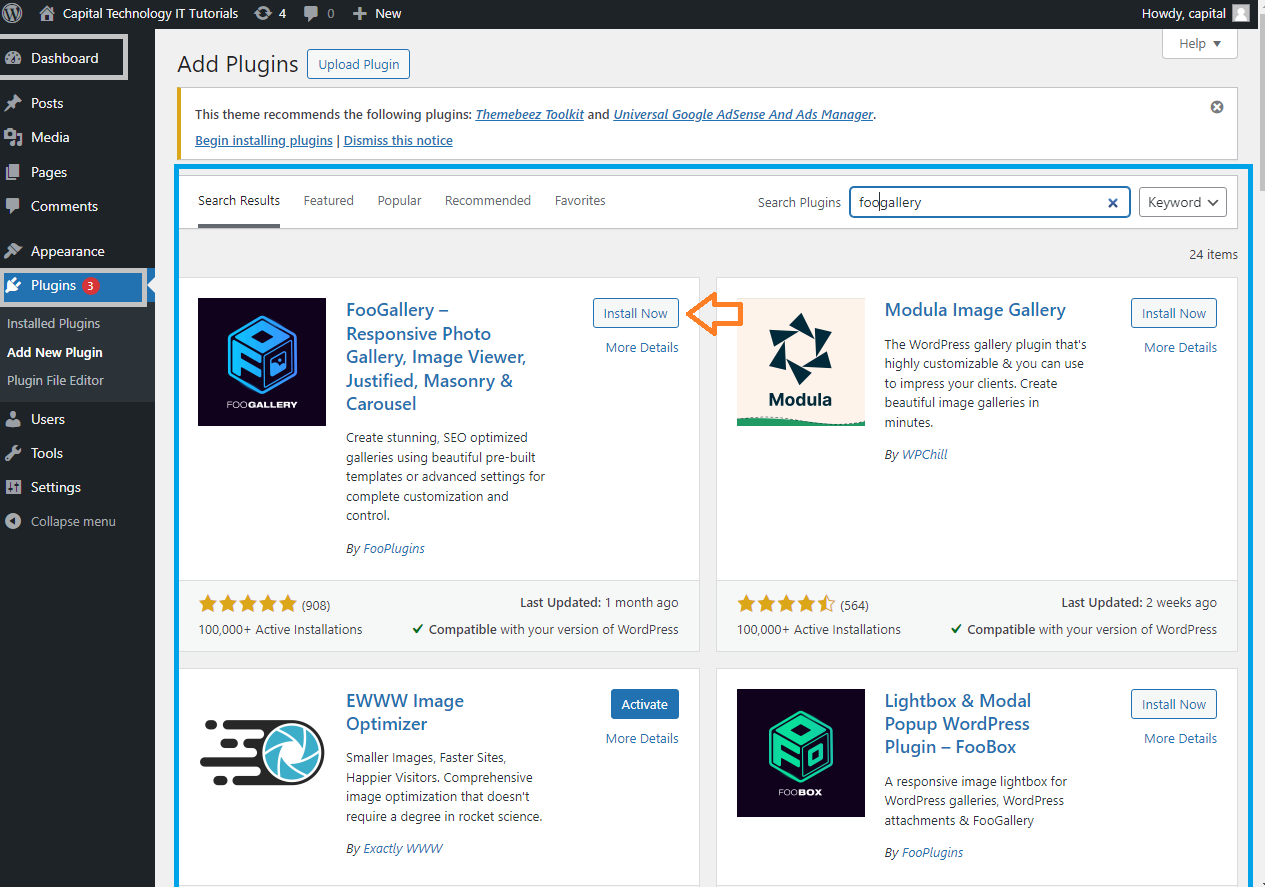
- In the search bar, type “FooGallery.”
- Find the “FooGallery – Image Gallery WordPress Plugin” and click
Install Now. - Once installed, click
Activateto enable the plugin.
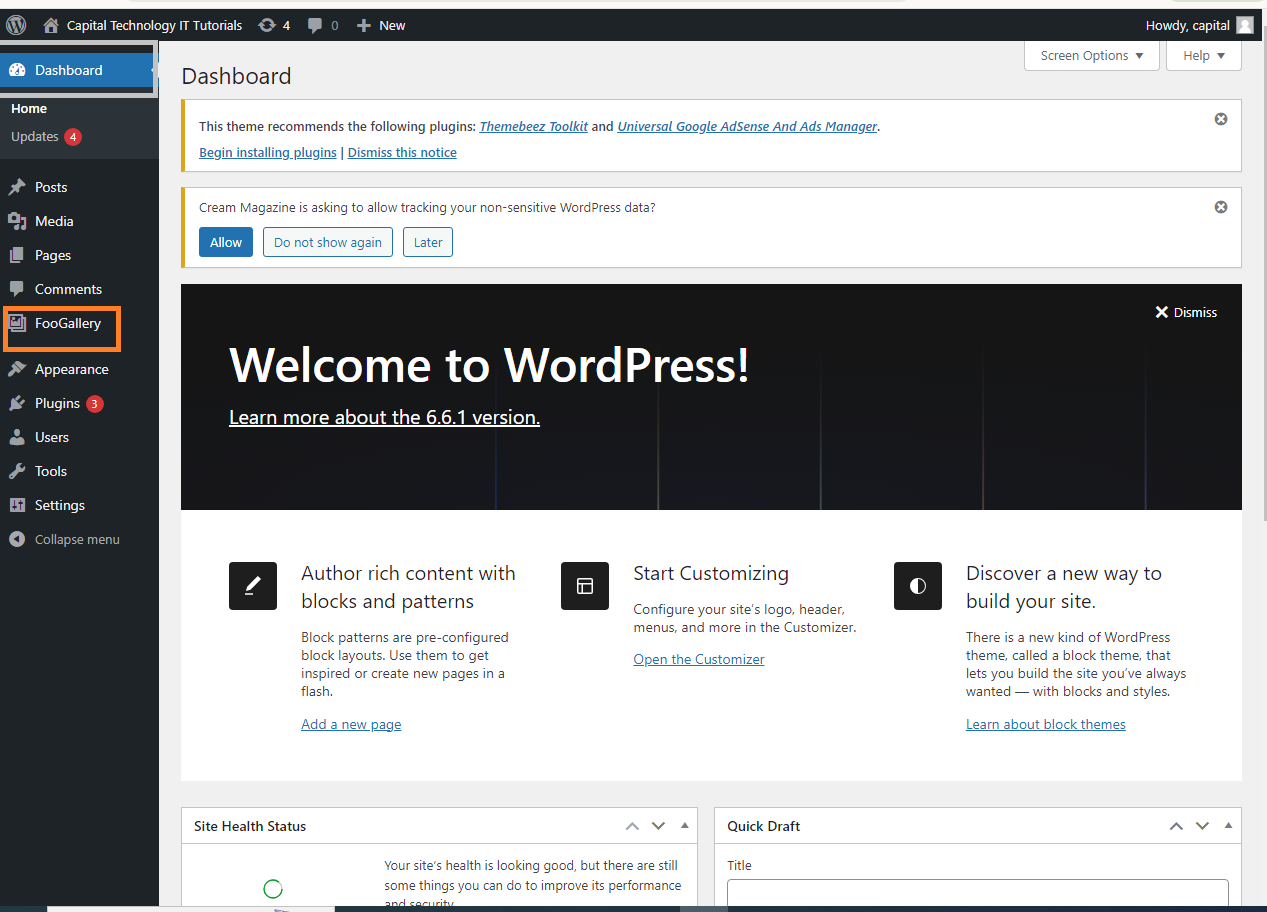
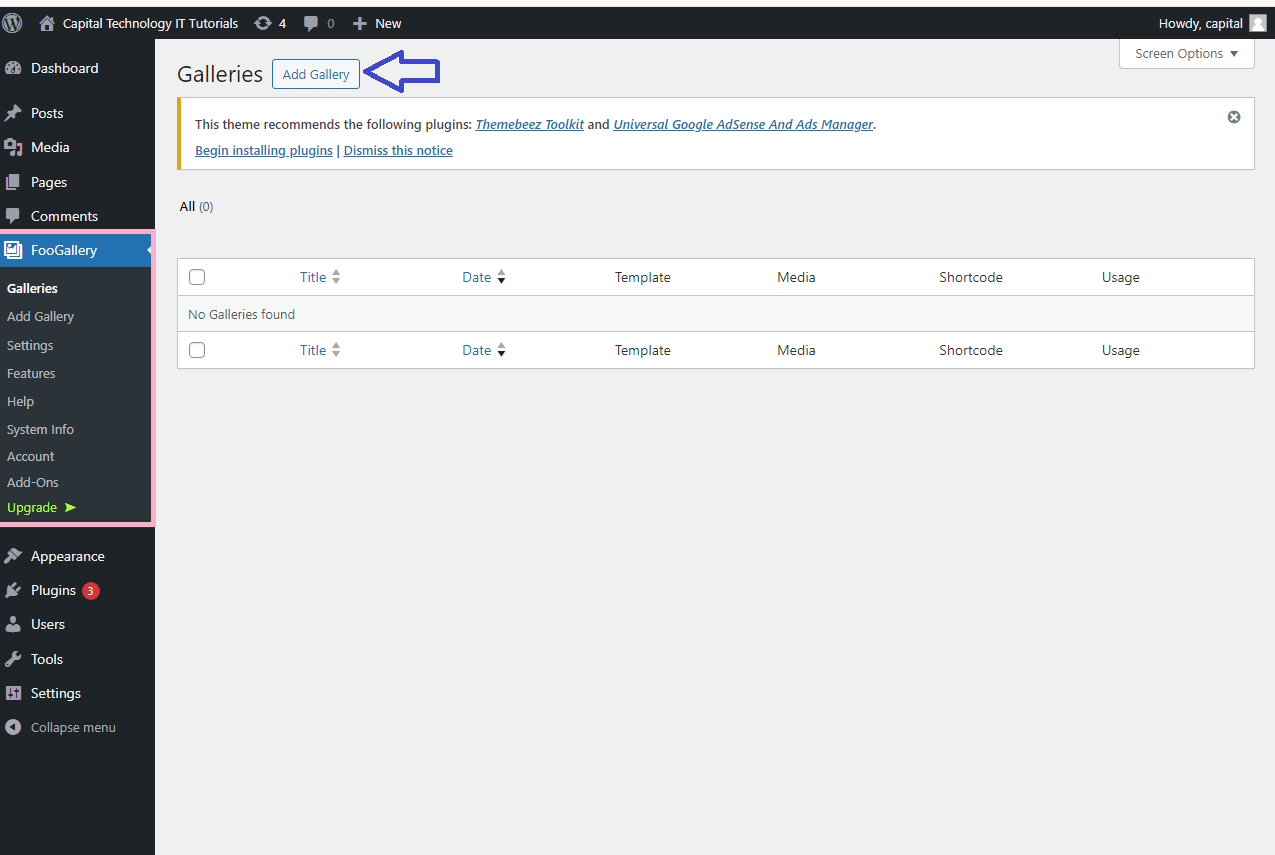
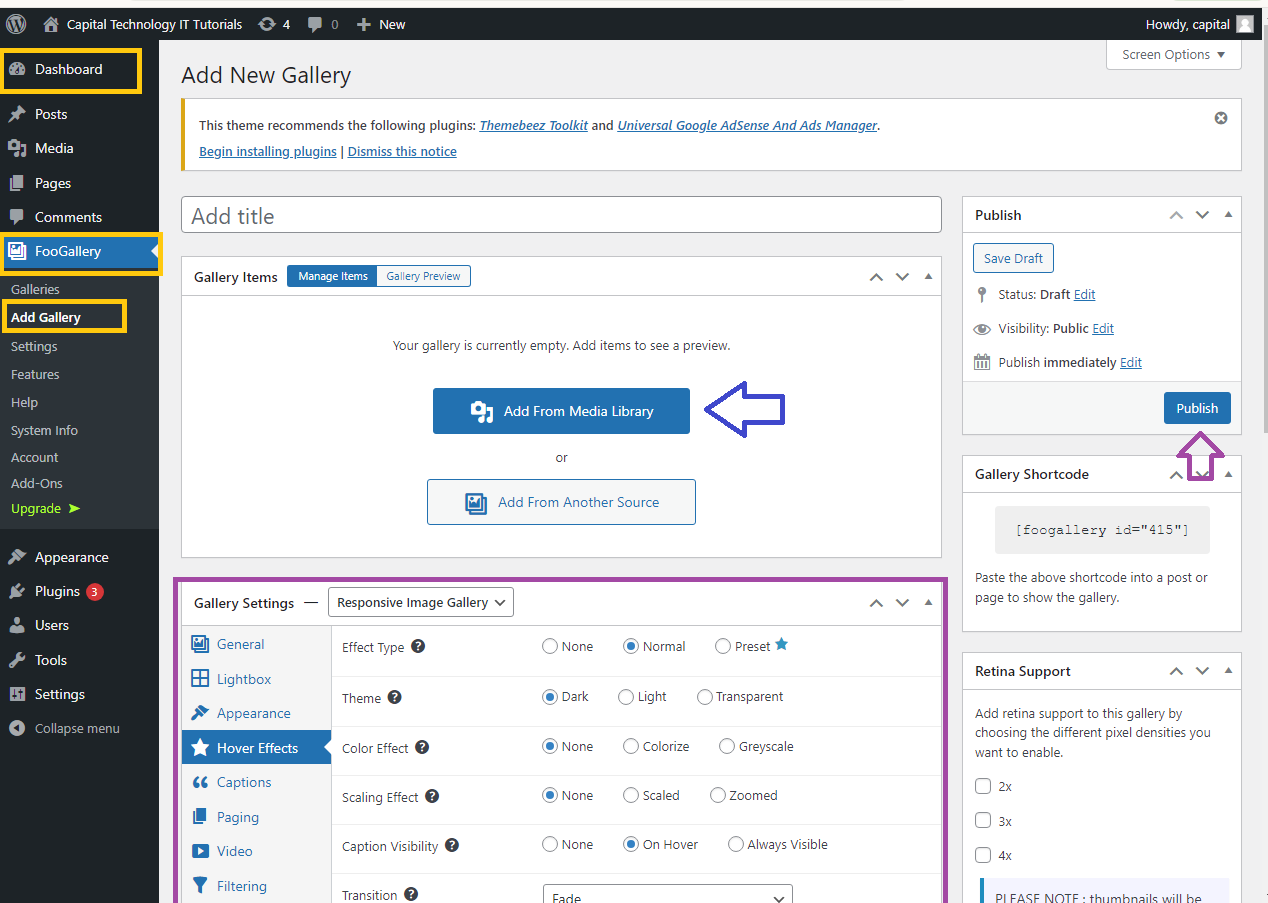
Step 2: Create a New Gallery
- After activation, you’ll see a new
FooGallerymenu in your WordPress dashboard. - Click on
FooGallery>Add Gallery. - Click the
Add Mediabutton to upload new images or select images from your WordPress media library. - After selecting the images, click
Create Galleryand thenInsert Gallery.
Step 3: Configure Gallery Settings
- You’ll be redirected to the gallery settings page where you can customize the gallery:
- Gallery Template: Choose from various templates (e.g., Responsive Image Gallery, Justified Gallery, Masonry Gallery).
- Thumbnail Size: Adjust the size of the thumbnails displayed in the gallery.
- Hover Effects: Choose hover effects for the images.
- Lightbox Settings: Select how images open when clicked (e.g., in a lightbox).
- Captions: Enable or disable image captions.
- After configuring the settings, click
Publishto save your gallery.
Step 4: Add the Gallery to a Page or Post
- Go to the page or post where you want to display the gallery.
- In the WordPress editor, click the
+button to add a new block. - Search for the
FooGalleryblock and select it. - From the dropdown menu, choose the gallery you just created.
- The gallery will be embedded in your page or post.
Step 5: Preview and Publish
- Click
Previewto see how the gallery will look on your page or post. - If you’re satisfied with the result, click
PublishorUpdateto make the gallery live on your site.
Now your image gallery should be successfully added to your WordPress site using the FooGallery plugin!


