Create Footer Section using the widget RSS Feeds widget

To create a footer section using the RSS Feeds widget in WordPress, follow these easy steps:
Step 1: Access the WordPress Dashboard
- Log in to your WordPress admin dashboard.

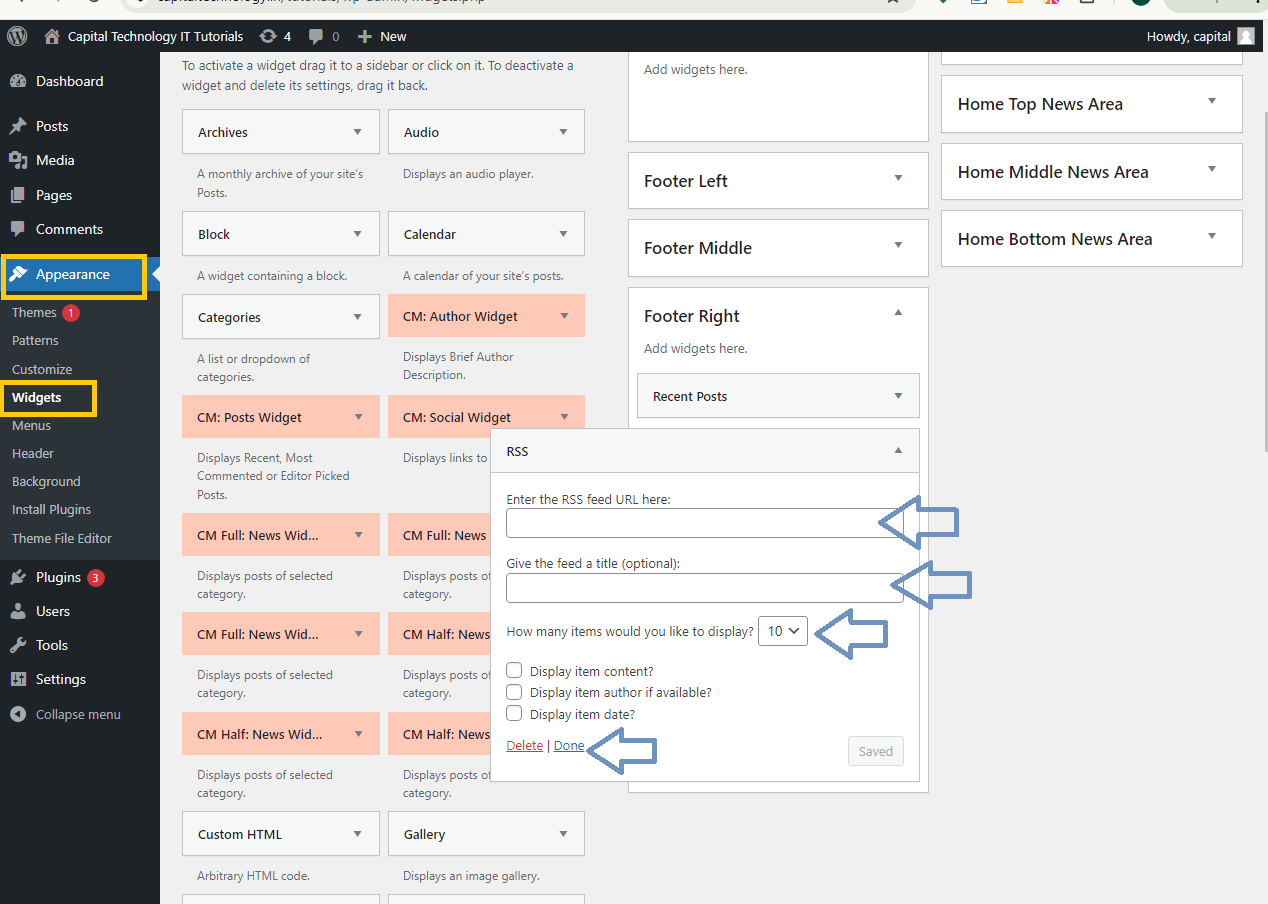
Step 2: Navigate to the Widgets Area
- Go to
Appearance>Widgets.

- Here, you’ll see various widget areas, including the Footer section. Select the Footer widget area where you want to add the RSS Feeds widget.

Step 3: Add the RSS Feeds Widget
- In the Widgets area, locate the
RSSwidget from the list of available widgets. - Drag and drop the
RSSwidget into the Footer widget area.

Step 4: Configure the RSS Feeds Widget
- After adding the widget, you’ll see a configuration panel.
- Enter the RSS feed URL in the “Enter the RSS feed URL here” field.
- Customize the settings:
- Give the feed a title (optional): This will be the heading of the RSS feed section in the footer.
- How many items would you like to display?: Set the number of feed items to display.
- Display item content?: Check this box if you want to show a summary of the content.
- Display item author if available?: Check this box if you want to display the author’s name.
- Display item date?: Check this box if you want to show the publication date.
Step 5: Save and Preview
- After configuring the settings, click the
Savebutton. - Visit your website to see the RSS feed displayed in the footer section.

Step 6: Customize Footer Appearance (Optional)
- If you want to further customize the appearance of your footer, go to
Appearance>Customize.

- Navigate to
Footersettings where you can adjust the layout, colors, and design to match your site’s theme.

Your footer section should now include the RSS Feeds widget, displaying the latest posts or content from the RSS feed URL you provided.


