Add Facebook Comments on WordPress

Steps to Add Facebook Comments in Elementor
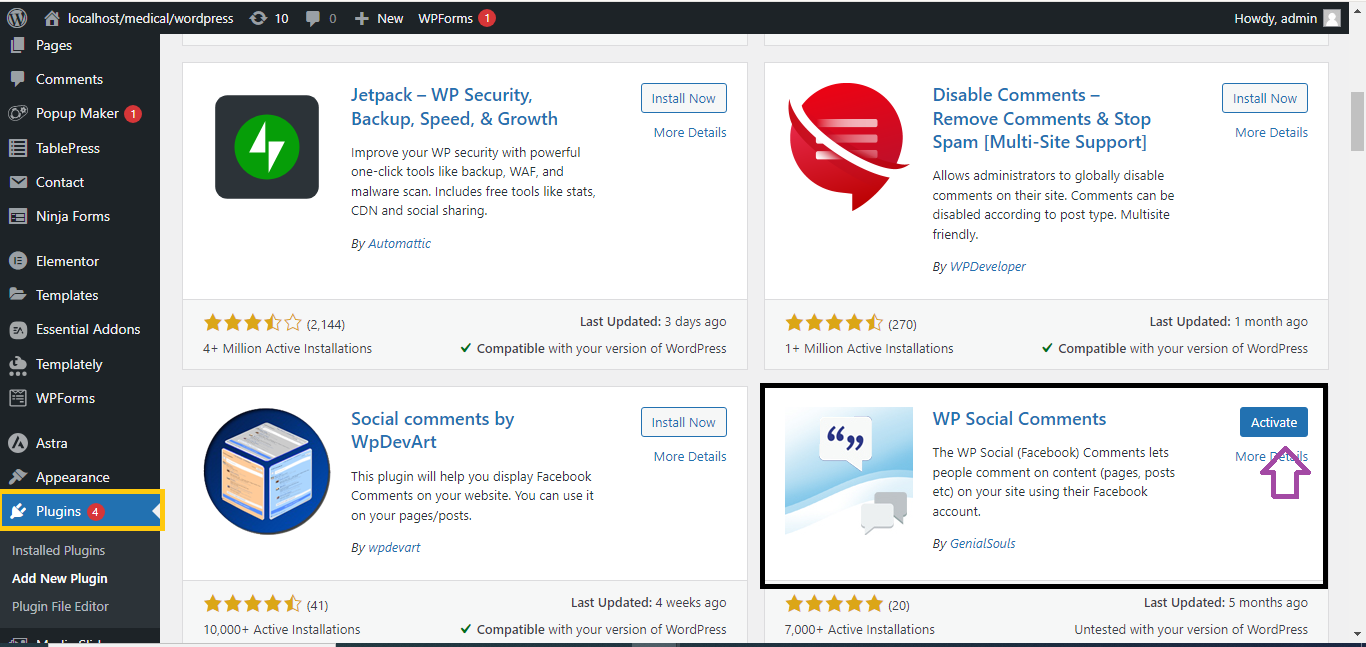
- Install Facebook Comments Plugin:
- Go to your WordPress Dashboard.
- Navigate to Plugins > Add New.
- Search for “Facebook Comments” plugin (e.g., Facebook Comments by WPDeveloper).
- Click Install and then Activate the plugin.
- Configure Facebook Comments Plugin:
- After activation, go to the plugin’s settings (usually under Settings > Facebook Comments).
- Enter your Facebook App ID (if required, you can create one at the Facebook Developer Page).
- Configure the number of comments to display, layout style, and where to show comments (posts, pages, etc.).

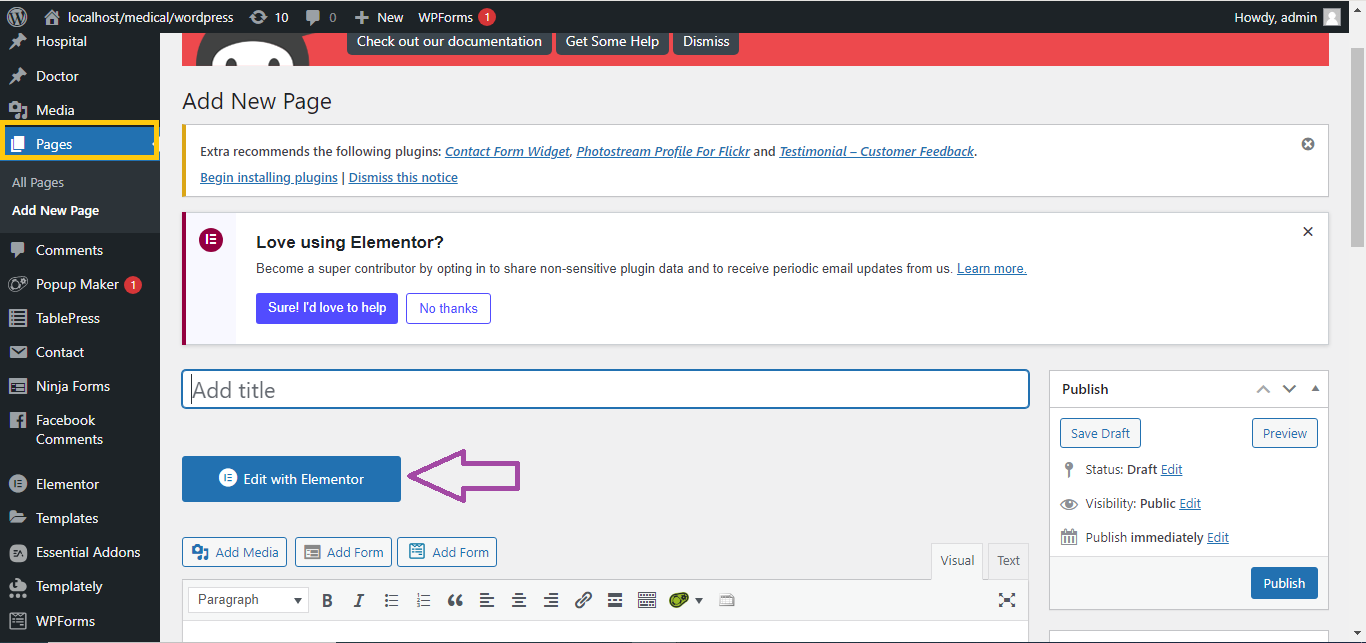
- Open Your Page in Elementor:
- In the WordPress dashboard, navigate to the page or post where you want to add Facebook comments.
- Click Edit with Elementor.
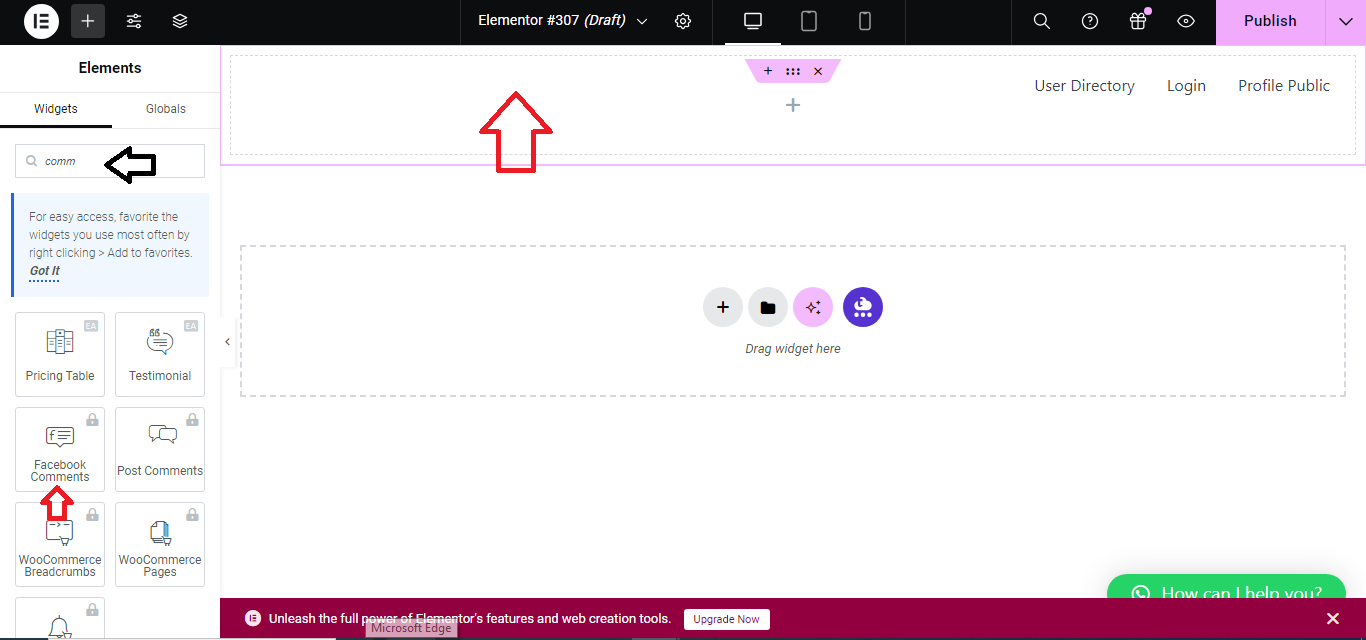
- Add the Facebook Comments Widget:
- In Elementor’s widget search bar, type “Facebook Comments.”
- If you don’t see it, you can install the Essential Addons for Elementor plugin, which includes a Facebook Comments widget.
- Drag and drop the Facebook Comments widget to the desired location on your page.
- Customize the Widget:
- In the widget’s settings, you can adjust the number of comments, colors, width, and layout to match your website’s design.
- Save and Publish:
- Once you’ve configured the settings, click Update to save your changes.
Your visitors will now be able to comment using their Facebook accounts directly on your Elementor page!


