Add Pro Slider in WordPress

1. Login to WordPress Dashboard
- Go to your WordPress site and log in.

2. Create a New Page for the Slider
- Go to Pages > Add New.
- Title your page (e.g., “Home” or “Slider”).
- Click Edit with Elementor to open the Elementor editor.

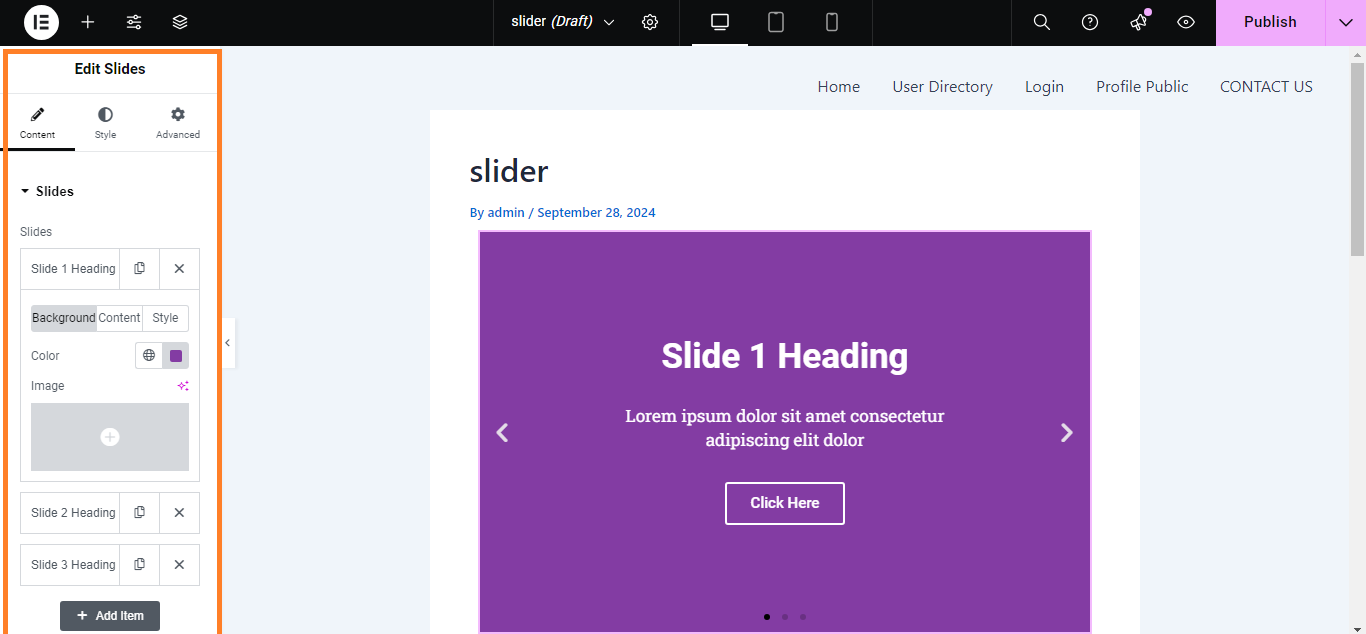
3. Use the Slider Widget
- In the Elementor editor, search for the “Slides” widget (this is the Pro Slider).
- Drag and drop the Slides widget onto your page.

4. Add Slides to the Slider
- In the Content tab of the Slides widget:
- Click on the Add Item button to create a new slide.
- For each slide, add:
- Image: Click on the image area to upload or select an image from the media library.
- Title: Enter a title for the slide.
- Description: Add a brief description if desired.
- Button: Optionally, add a button with a label and link.
5. Configure Slider Settings
- Adjust settings like:
- Slider Height: Set the height for the slider.
- Slide Duration: Specify how long each slide should be displayed.
- Autoplay: Enable or disable autoplay for the slides.
- Navigation: Choose to show or hide arrows and dots for navigation.

6. Style the Slider
- Go to the Style tab to customize:
- Slide Title: Adjust typography, color, and spacing.
- Slide Description: Customize the look of the description text.
- Button Style: Style the button’s color, typography, and hover effects.

7. Advanced Settings (Optional)
- Click on the Advanced tab to adjust margins, padding, motion effects, and other advanced options.

8. Publish the Page
- Once you’re satisfied with your slider, click Publish to make it live.

9. Add Slider to Menu (Optional)
- If you want users to easily access the page, go to Appearance > Menus and add your slider page to the menu.

Your Pro Slider is now ready and beautifully displayed on your WordPress site using Elementor Pro!


