Adding Image Box

Steps to Add an Image Box in Elementor:
- Open Elementor Editor:
- In your WordPress dashboard, navigate to Pages or Posts, select the one you want to edit.
- Click Edit with Elementor.

- Add a New Section (Optional):
- Click the + icon to create a new section or use an existing one.

- Drag and Drop the Image Box Widget:
- On the Elementor panel, search for Image Box.
- Drag the Image Box widget into the desired location within your section.

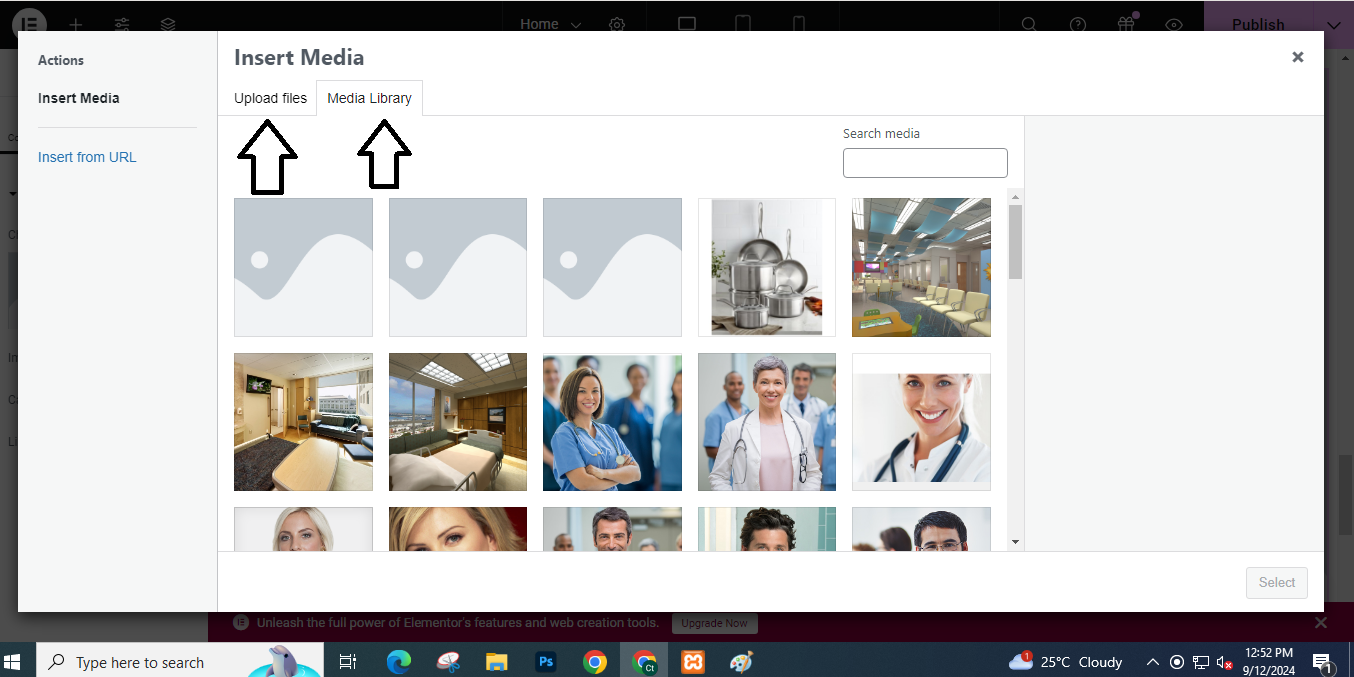
- Add Your Image:
- In the Content tab of the Image Box settings, click on the Choose Image area to upload an image or select one from your media library.
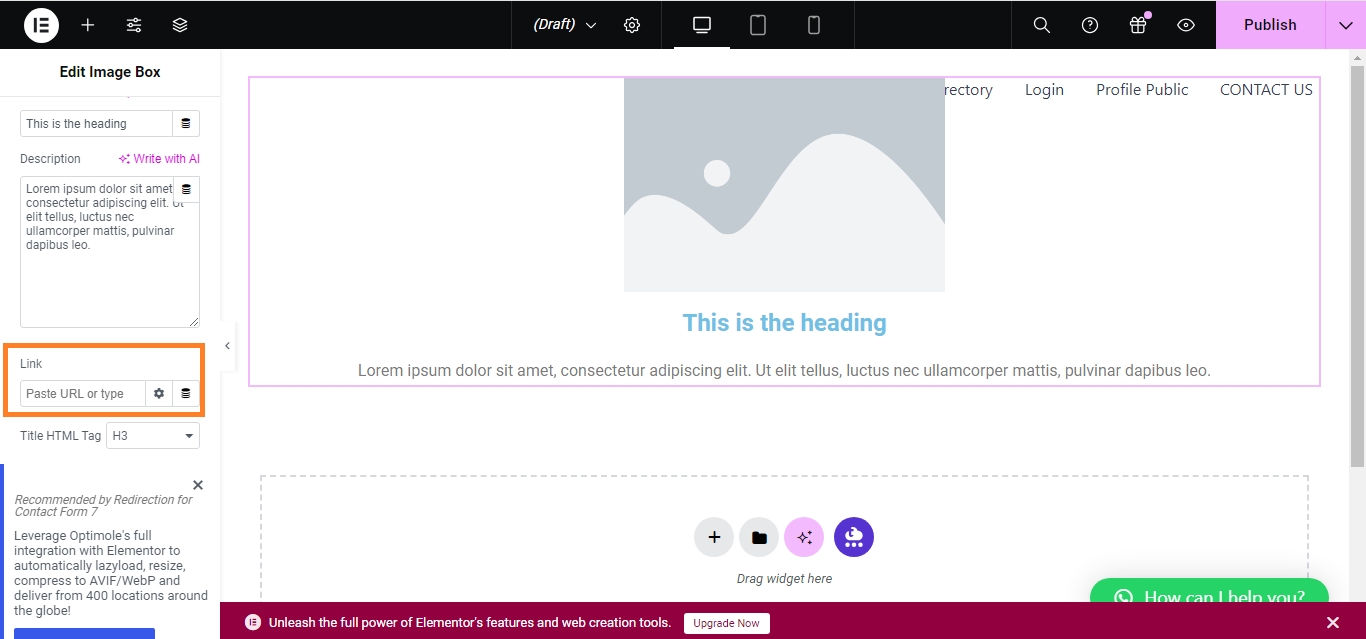
- Customize the Title and Description:
- Below the image, enter your Title and Description in the provided fields.

- Set a Link (Optional):
- If you want the Image Box to link to another page or URL, you can enter the link in the Link field under the Content tab.
- Style the Image Box:
- Switch to the Style tab to customize the Image, Content, and Typography (text size, color, etc.).
- Adjust settings like image size, spacing, and color as needed.

- Advanced Settings (Optional):
- Use the Advanced tab to adjust margins, padding, or add motion effects.

- Publish the Page:
- Once you’re satisfied, click Update/Publish to save your changes.

That’s it! You’ve added an Image Box using Elementor.


