Install WordPress on Localhost
Installing WordPress on localhost allows you to create and test your website locally before publishing it on the internet. Here’s a step-by-step guide on how to install WordPress on localhost using a popular software stack called XAMPP. XAMPP includes Apache, MySQL, PHP, and Perl, making it easy to set up a local development environment.
Step 1: Download and Install XAMPP
Go to the official XAMPP website: https://www.apachefriends.org/index.html
Download the XAMPP installer for your operating system (Windows, macOS, or Linux).
Run the installer and follow the on-screen instructions to install XAMPP.
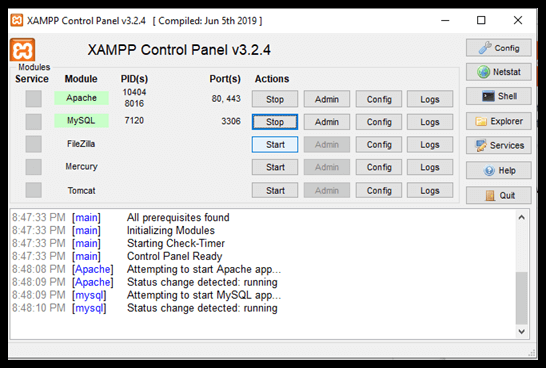
Step 2: Start Apache and MySQL Services
After installing XAMPP, launch the XAMPP Control Panel.
Start the Apache and MySQL services by clicking the “Start” button next to each of them.
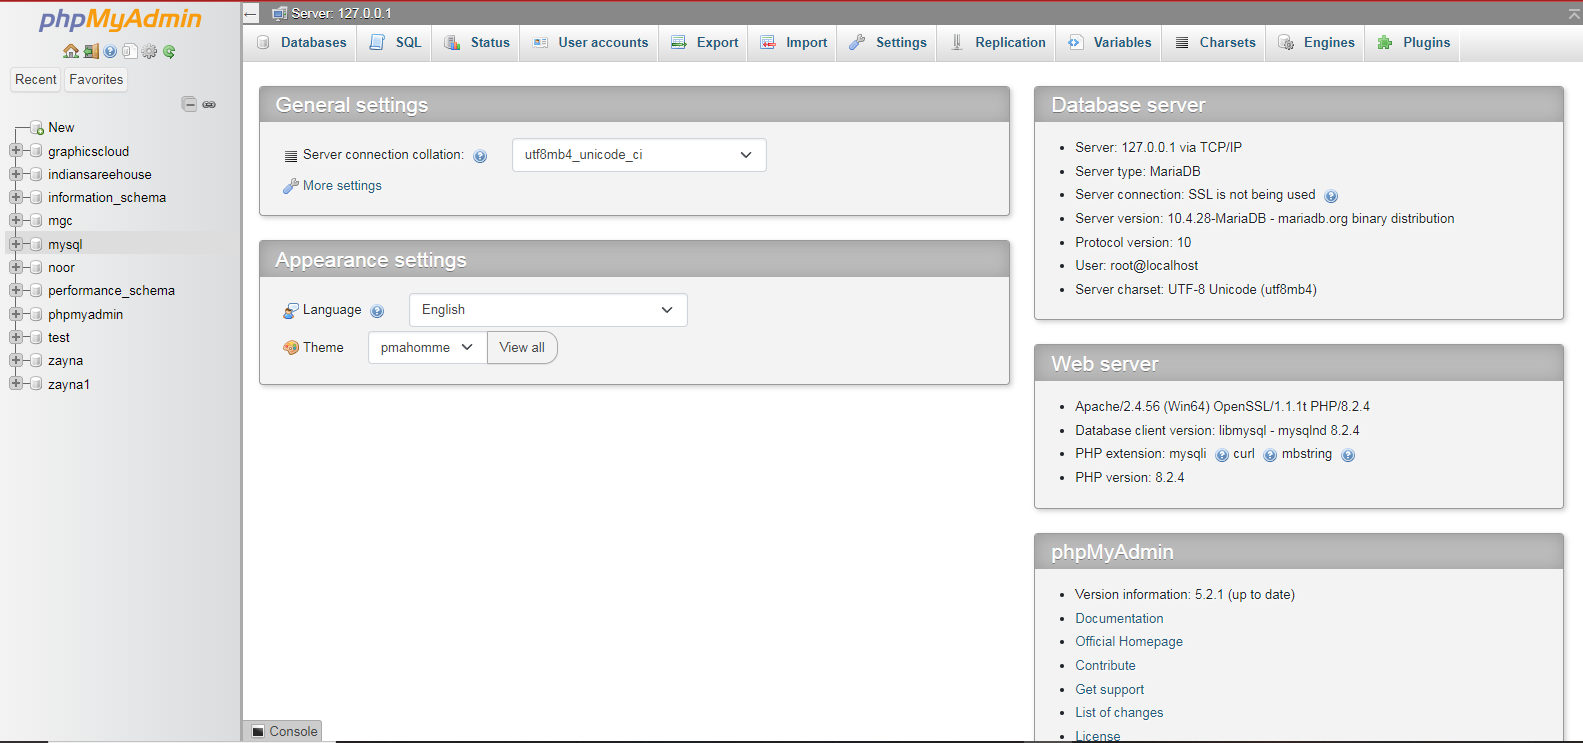
Step 3: Create a Database
Open your web browser and go to http://localhost/phpmyadmin/.
Click on the “Databases” tab.
Enter a name for your WordPress database in the “Create database” field.
Click the “Create” button to create the database.
Step 4: Download WordPress
Visit the official WordPress website: https://wordpress.org/download/
Download the latest version of WordPress.
Extract the WordPress zip file to the “htdocs” folder inside your XAMPP installation directory (e.g., C:\xampp\htdocs\ on Windows).
Step 6: Install WordPress
Open your web browser and go to http://localhost/your-wordpress-folder (replace “your-wordpress-folder” with the actual folder name).
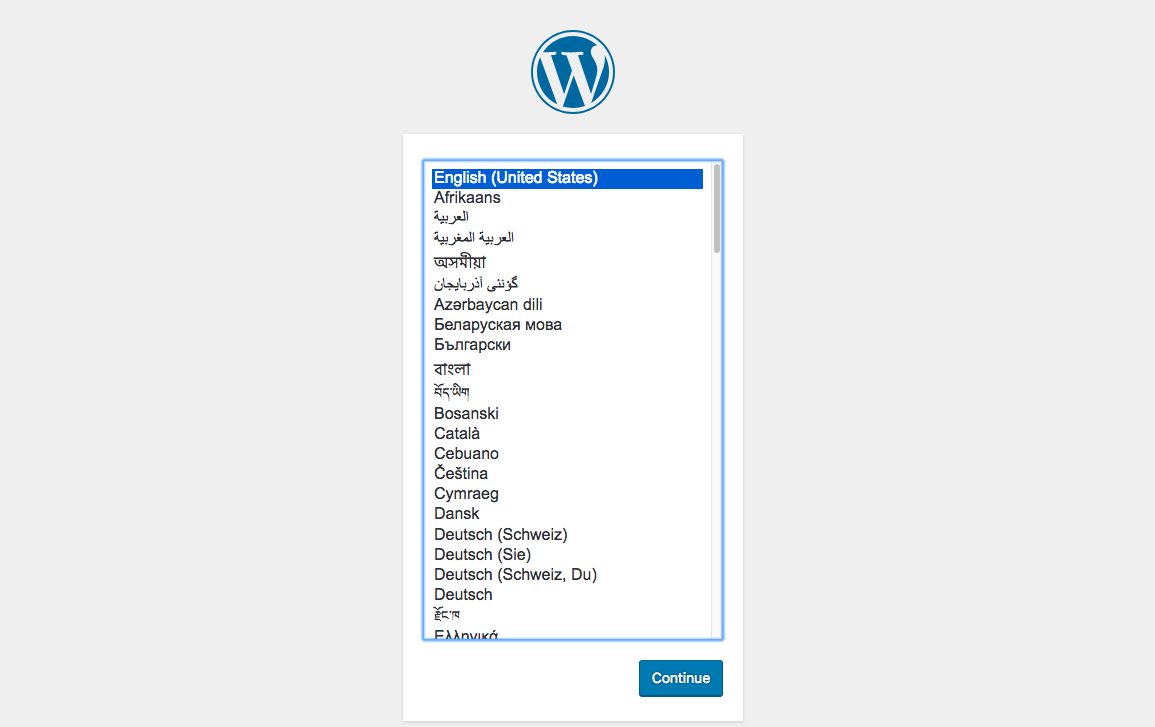
Select your language and click “Continue.”
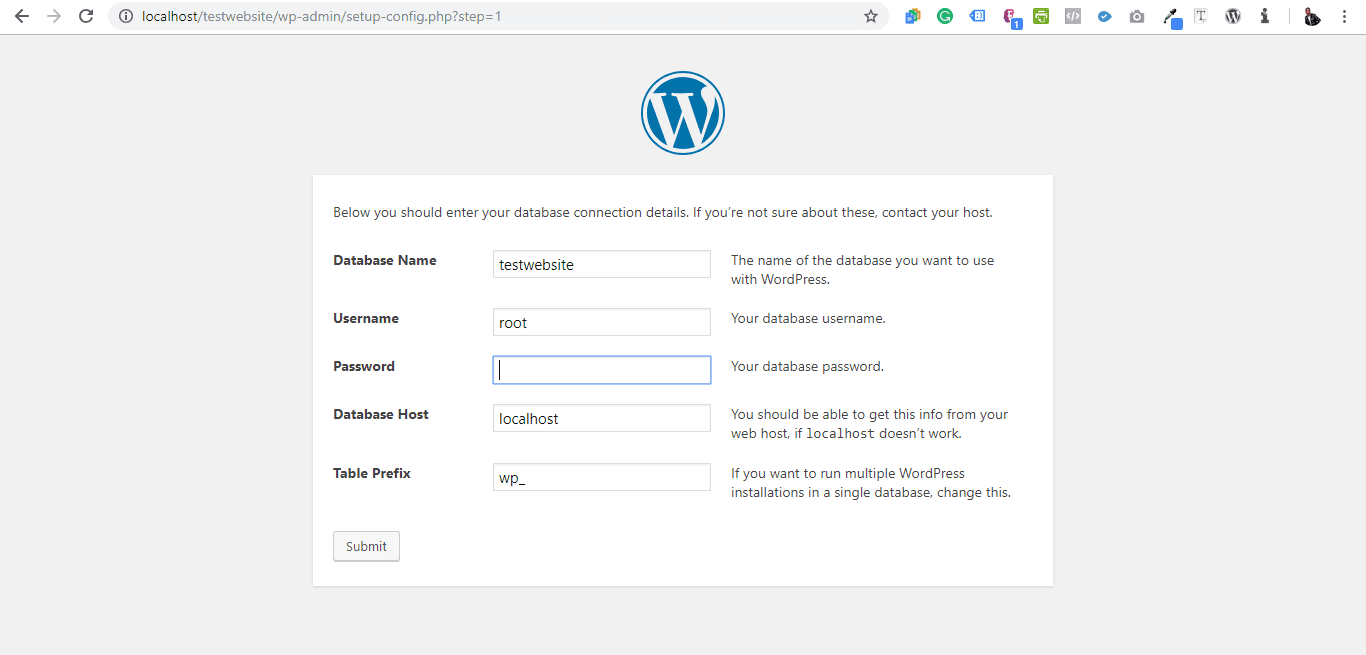
Enter the database information:
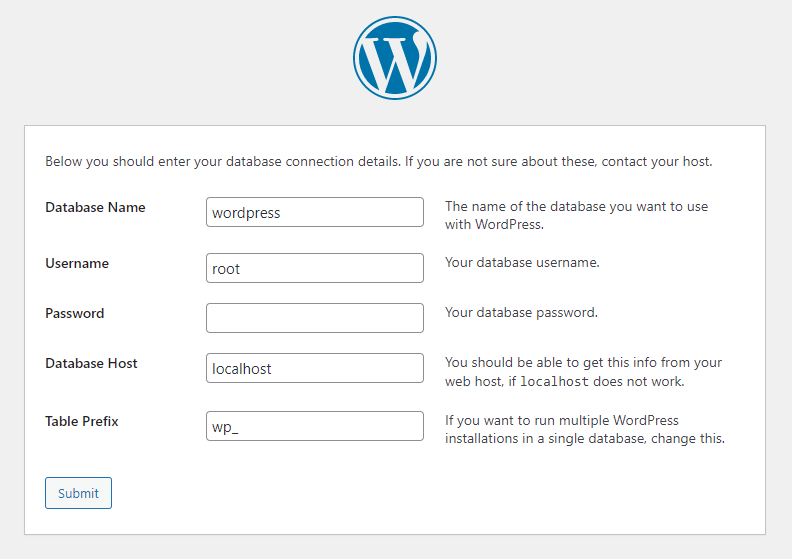
Database Name: The name of the database you created.
Username: ‘root’
Password: Leave it blank.
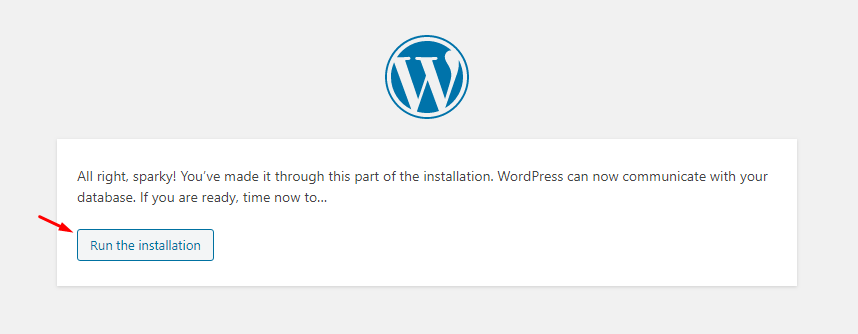
Click “Submit” and then click “Run the installation.”
Enter your site information, create a username and password for the admin account.
Click “Install WordPress.”
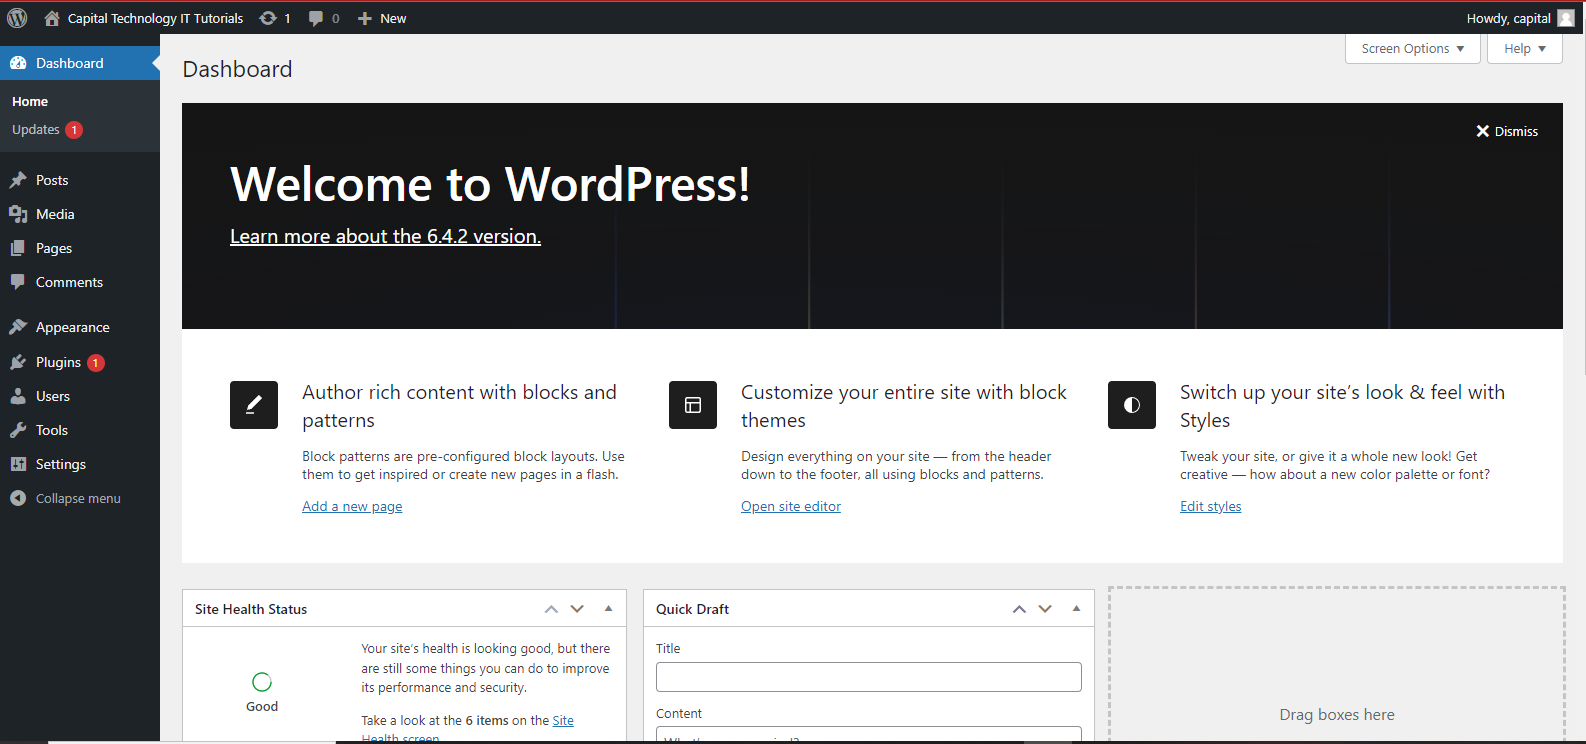
Step 7: Access Your Local WordPress Site
After installation, log in to your WordPress admin dashboard by going to http://localhost/your-wordpress-folder/wp-admin/.
Use the admin credentials you set during the installation.