How to Upload WordPress Website from Localhost to Live Server?
Here’s a simple step-by-step guide to upload your WordPress website from localhost to a live server:
Step 1: Choose a Hosting Provider and Set Up
- Sign up for a web hosting service if you haven’t already (e.g., Bluehost, SiteGround).
- Get access to the cPanel or your hosting control panel, where you’ll manage your website.

Step 2: Download Your Local WordPress Files
- Go to your localhost WordPress folder (usually
C:\xampp\htdocs\your-siteif using XAMPP). - Compress the entire folder (right-click > Compress to ZIP file).

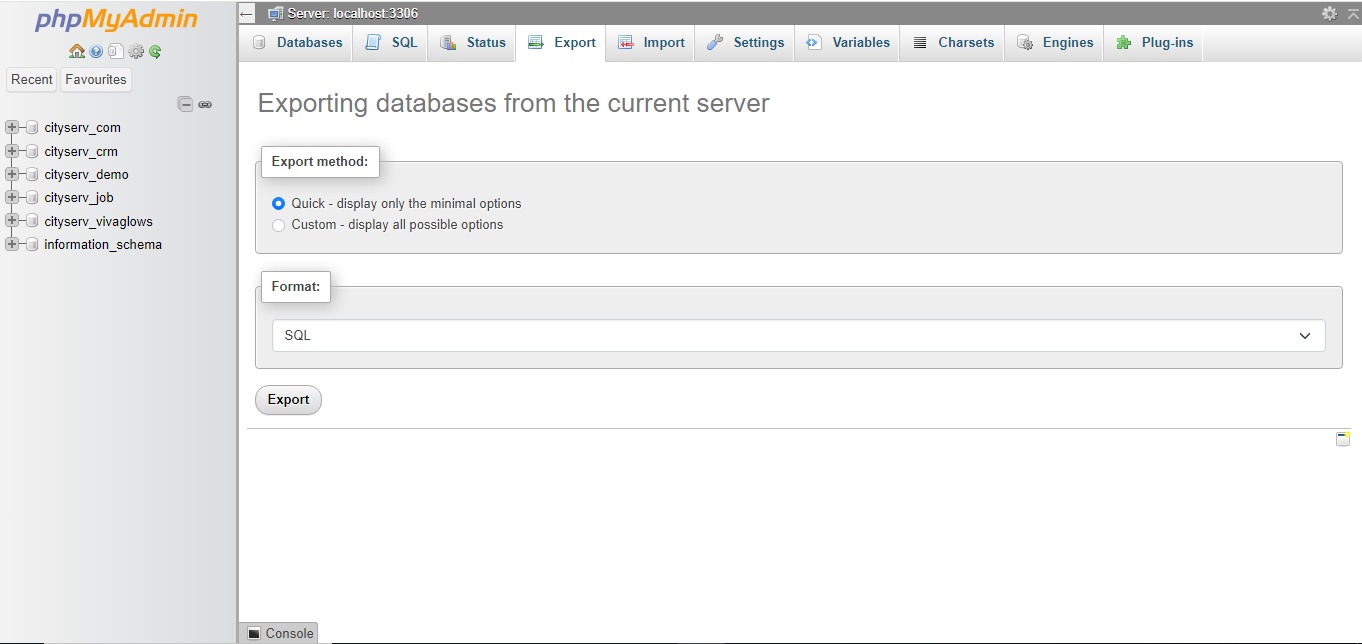
Step 3: Export Your Local Database
- Open phpMyAdmin from your localhost setup (e.g., XAMPP).
- Select your WordPress database.
- Click on the Export tab and select Quick method, then click Go to download your
.sqlfile.
Step 4: Upload WordPress Files to the Live Server
- Login to cPanel or your hosting control panel.
- Open File Manager and go to the directory where your website files should be uploaded (usually
public_html).

3. Click Upload and upload the ZIP file of your WordPress site from Step 2.
4. Once uploaded, extract the ZIP file in the same directory.

Step 5: Create a New Database on the Live Server
- In cPanel, go to MySQL Databases.

2. Create a new database, user, and assign the user full permissions to the database.
3. Note down the database name, username, and password.

Step 6: Import the Local Database
- Go to phpMyAdmin in cPanel.
- Select the database you created.
- Click on the Import tab, choose the
.sqlfile you exported earlier, and click Go to import it.

Step 7: Update wp-config.php
- In the File Manager, open the
wp-config.phpfile in your WordPress directory. - Update the following lines with your live server’s database details:
php
define('DB_NAME', 'your_live_database_name');

define('DB_USER', 'your_live_database_user');

define('DB_PASSWORD', 'your_live_database_password');

define('DB_HOST', 'localhost'); // In most cases, this will be localhost.

Step 8: Update the Site URL in the Database
- In phpMyAdmin, go to your live database.
- Open the wp_options table.
- Find
siteurlandhomerows. - Change the URLs to your live domain name (e.g.,
https://yourdomain.com).
Step 9: Check Your Site
- Go to your domain (e.g.,
https://yourdomain.com) and check if your site is live.
Now your WordPress site is successfully moved from localhost to a live server!


