Recent Posts with Thumbnails

Here’s how to display recent posts with thumbnails in WordPress using a plugin:
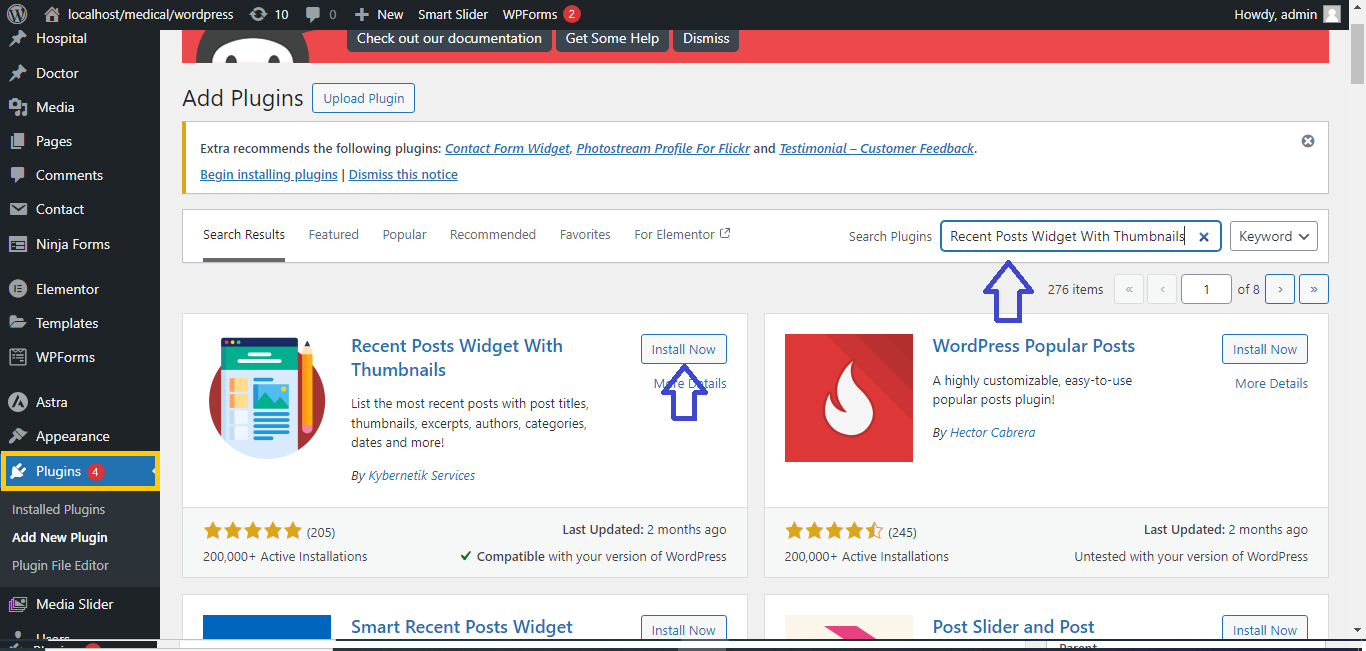
Step 1: Install the “Recent Posts Widget With Thumbnails” Plugin
- Go to Plugins > Add New in your WordPress dashboard.
- In the search bar, type “Recent Posts Widget With Thumbnails.”
- Click Install Now on the plugin.
- After installation, click Activate.
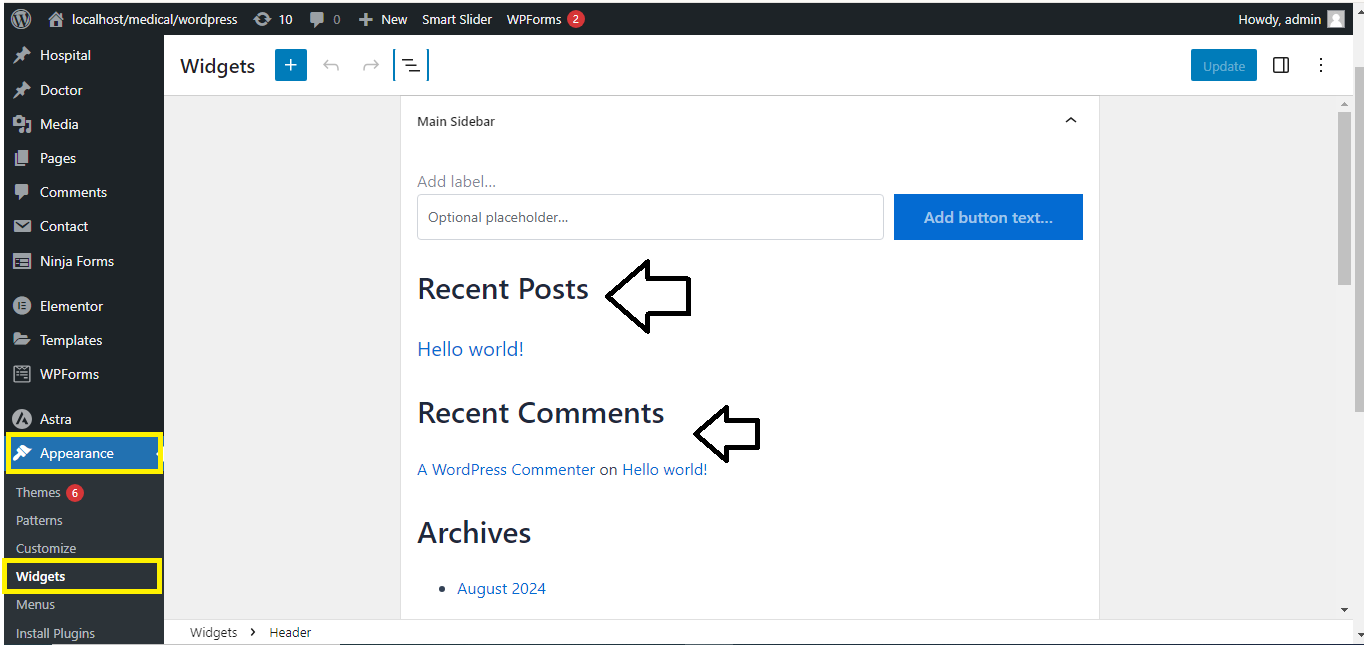
Step 2: Add the Recent Posts Widget
- Go to Appearance > Widgets in your WordPress dashboard.
- Look for the Recent Posts Widget With Thumbnails widget.
- Drag and drop it into your desired widget area (e.g., Sidebar, Footer).
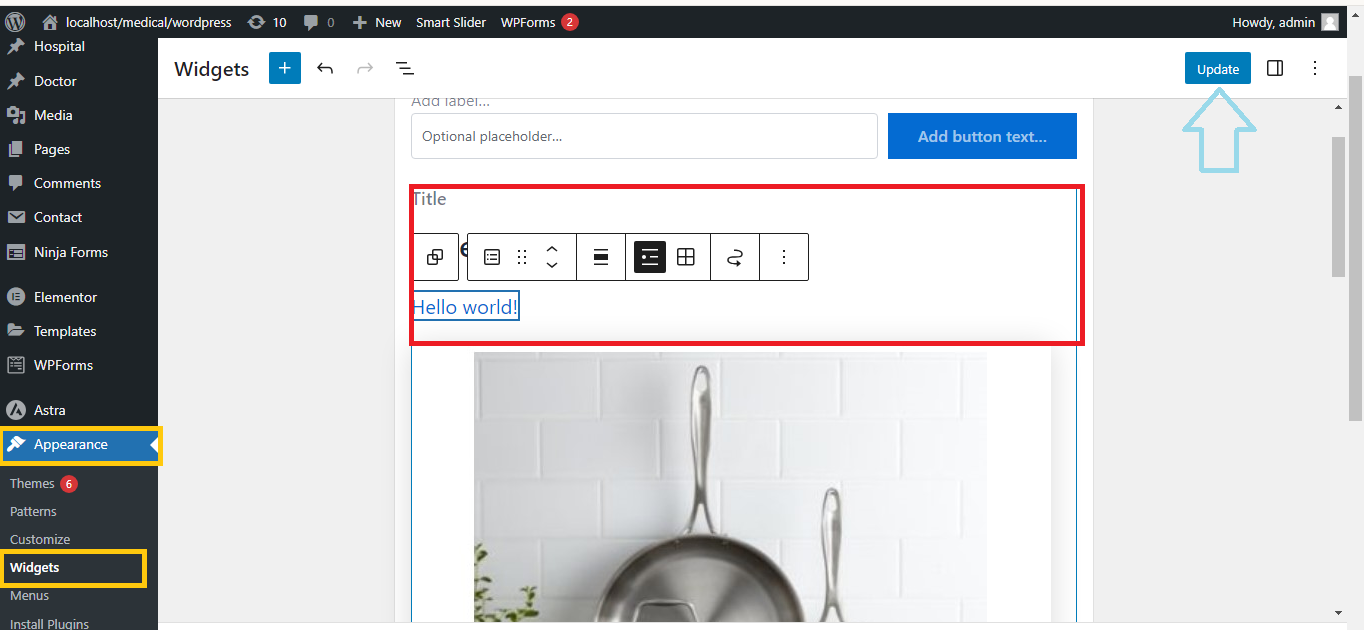
Step 3: Configure the Widget Settings
- In the widget settings, you can:
- Set the Title for the widget (e.g., “Recent Posts”).
- Choose the number of posts to display.
- Adjust the thumbnail size and alignment.
- Select whether to show the post date or excerpt.
- After configuring the settings, click Save.
Step 4: View the Recent Posts
- Visit your site’s front end to see the recent posts with thumbnails displayed in the selected widget area.
That’s it! You’ve successfully added a Recent Posts widget with thumbnails to your WordPress site.


